Views
Views are a combination of a definition of:
- an index for the database (or multiple indexes, if you have re-sortable columns).
- a user interface for displaying the entries in that index.
Updating Existing Views
- In the Applications view of Domino Designer, double-click on the Views part in the To Do application.
- Double-click on the “completeView” view to open it.
-
Open the View Properties box by either clicking the “View/Folder Properties” button, pressing Alt + Enter, or double-clicking a column header and changing the filter at the top from “Column” to “View”.
Alt + Enter opens the Properties dialog in any context. The drop-down allows you to change which properties are being displayed, based on what’s available for the current focus.
- Switch to the second tab, “Options” with the “i” icon.
-
Change the “On Refresh” combo box option to “Refresh Display”.
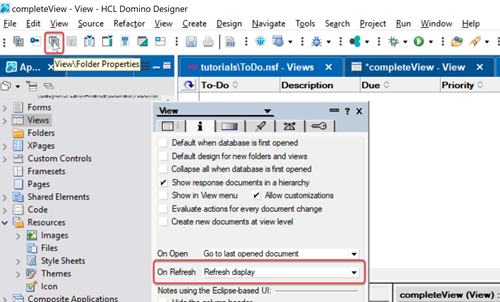
The application will be used offline on HCL Nomad and the views should automatically update as soon as changes are made. For this reason the views will be set to refresh the display whenever refreshing is needed.
- Switch to the third tab, “Style” with the gradient icon.
- In the “Header” section, change the style to “Simple”.
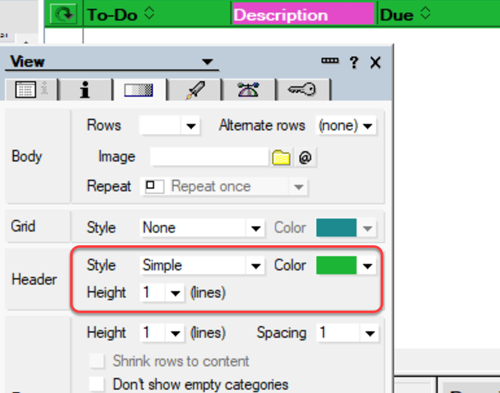
- Click on the Color combo box and, in the popup, click on the colour picker.
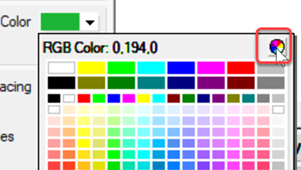
-
Enter the RGB values to correspond to the hex colour used on the Completed images - 29, 181, 54.
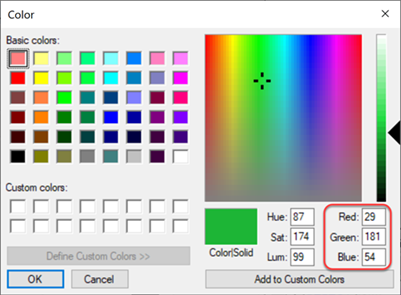
For an advanced challenge, try to save the colours as custom colours for future use.
- Save and close the view.
- Repeat for each of the other views except for the column header colours which should be:
- incompleteView - RGB 45, 114, 173
- overdueView - RGB 255, 0, 0
- todosView - RGB 192, 192, 192
- urgentView - RGB 252, 186, 3
The colours for the column headers will reinforce which view the user is currently in.
-
Change the View Selection formula for urgentView to
@Now <= duedate.To Dos will be marked as urgent if completion is due within the next three days. This ensures a To Do is still urgent on a Friday if due for completion on the following Monday.
- In the todosView, change the column value for the Complete column. Change the radio button from “field” to “formula” and enter the formula
@If(complete="true";84;83). Save and close the view. - Double click on the column header for Complete to bring up the properties box. Change the column width to 6.
-
Put a tick in “Display values as icons”. Save and close the view.
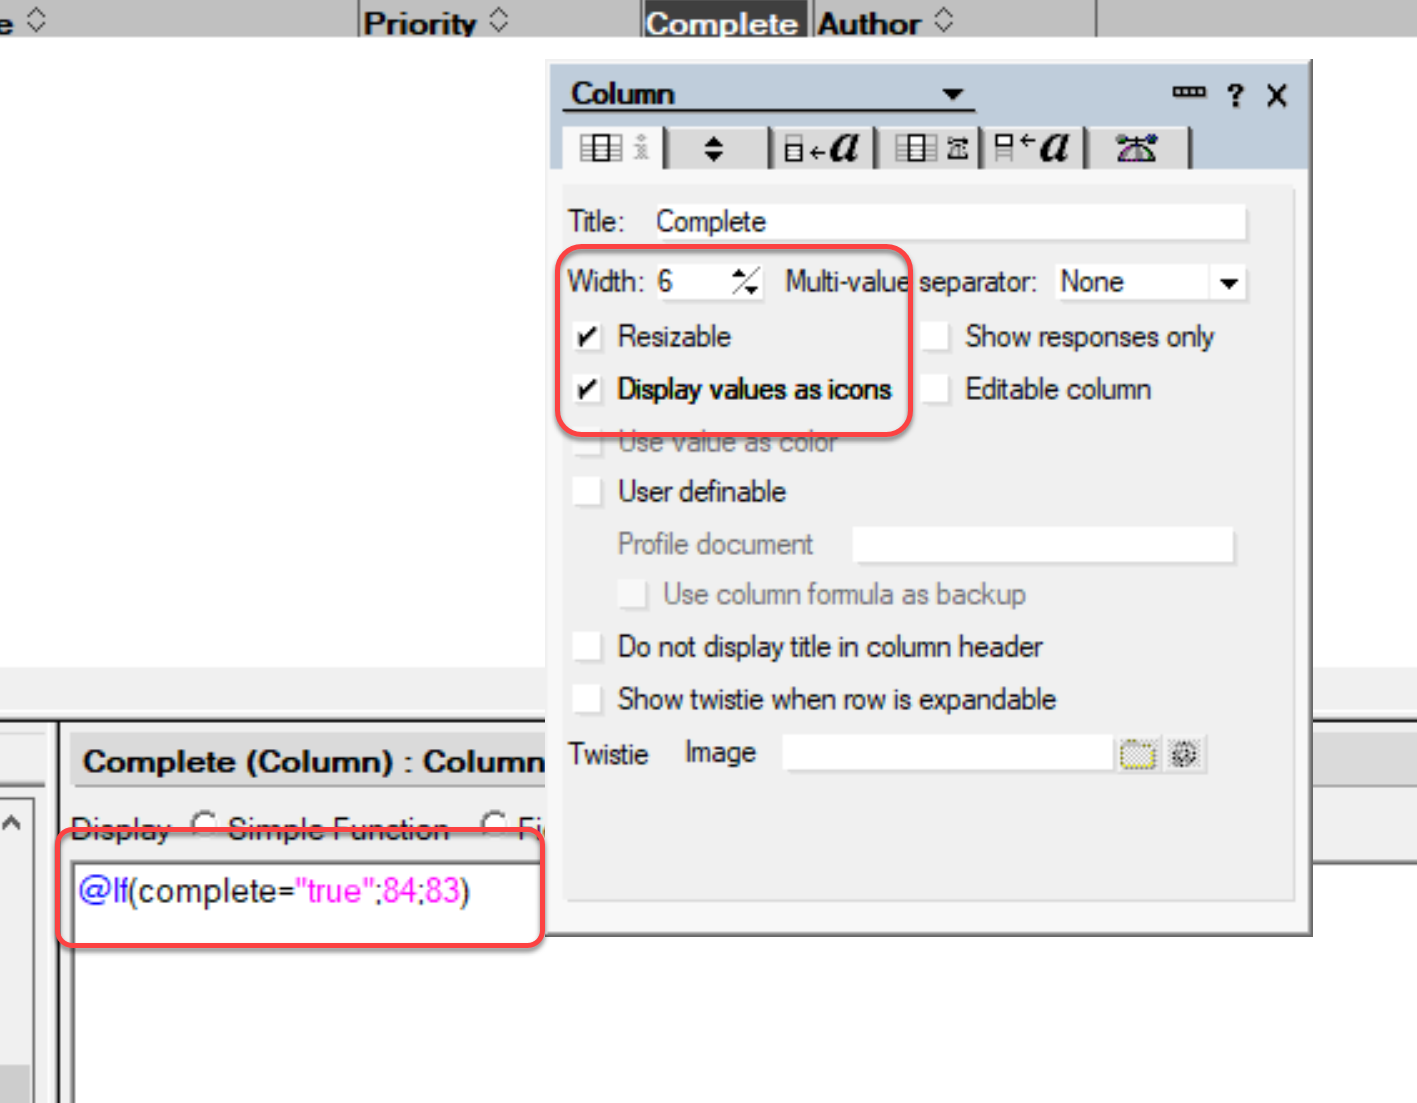
This will give a “thumbs up” icon if the To Do is completed, a “thumbs down” icon if it’s not.
@Now has a performance hit, because each entry needs regular recalculation against the current time. To take it further, think about another @Formula that could be used to ensure less frequent recalculations. As a much more advanced step, you could think about how to change the View Selection formulas for overdueView and urgentView to avoid using any time-specific @Formulas.
Create Calendar View
Calendar Views
Notes has a special view type that displays a calendar view in Notes and Nomad clients. It is set up with specific settings. The key one of those is that the first column must be a date-time sorted ascending.
-
Click the “New View” button and name the view “calendarView”. Leave all other settings at default and click OK.
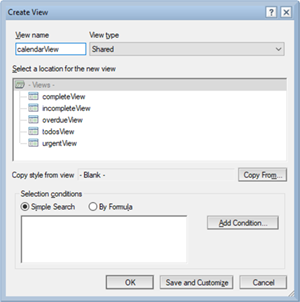
-
Open the View Properties and change the Style to “Calendar”.
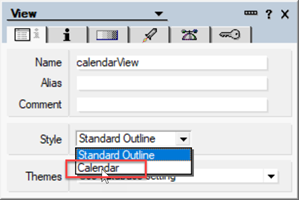
- Change the View Selection from “Simple Search” to “Formula” and set it to
SELECT (form = "todo"). - Switch to the second tab, “Options” with the “i” icon, and change the “On Refresh” combo box option to “Refresh Display”.
- Switch to the third tab, “Style” with the gradient icon.
- In the “Header” section, change the style to “Tabs”.
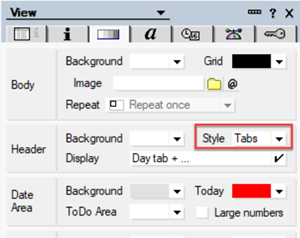
- Create a column with the title “Due”. On the second tab, “Sorting” with two-way vertical arrows, set the Sort to Ascending. Set the column value to be a field, `duedate”.
- Create the following additional columns, in order:
- To-Do, with the column value for the field
name. - Author, with the column value for a “Simple Function”,
Author(s) (Simple Name). - Prority, with the column value for the field
priority. - Completed, with the column value for the formula
@If(complete="true";84;83). Open the Column properties box and tick “Display values as icons”. Save and close the view.
- To-Do, with the column value for the field