Forms
The “todo” Form already exists. Although a Form is not needed for XPages, it sort of creates a documented schema. For Nomad and desktop clients it creates both a soft schema (programmatically that schema can still be amended) and a user interface for creating documents based on that schema.
Creating the Table
- In the Applications view of Domino Designer, double-click on the Forms part in the To Do application.
- Double-click on the “todo” form to open it.
- Add two new lines after the fields.
- Open the text properties by either clicking the “Text Properties” button, pressing Ctrl + k or using the menu option Text > Text Properties.
- Change the font to Verdana and the font size to 12. Note, there are also toolbar options for changing the font and setting the font size. These can be used instead.
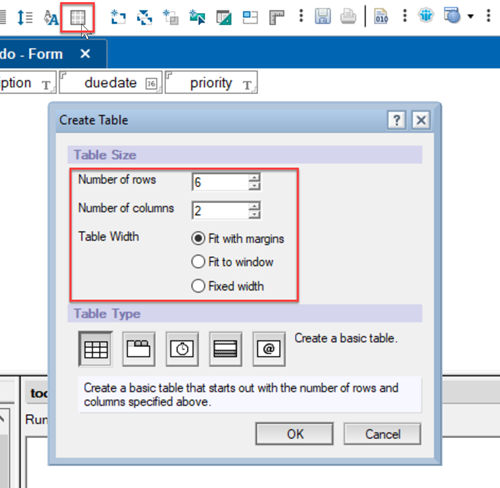
- Create a new table using the “Insert Table” button or the menu option Create > Table….
- Create the table with 2 rows, 2 column, and Table Width set to “Fit with margins”.
- Open the table properties by either clicking the “Table Properties” button or using the menu option Table > Table Properties.
-
Click into the first cell in the table. Change the first column width to 3.75cm, fixed width.

On the Table Properties, the cell settings are driven by the active cell, the cell the cursor is in.
- Select all cells in the first column. In Text Properties box, set the font weight to “Bold”. On the second tab, the Spacing for “Above” and “Below” to “1 1/2”. On the third tab, set the left margin to 0.2cm. This is likely to get changed to 0.199cm.
- Select all cells in the second column. In Text Properties box, on the second tab, the Spacing for “Above” and “Below” to “1 1/2”. On the third tab, set left margin to 0.2cm.
Populating the Table
-
Type the following text as labels in the first column - Status, Author, Task Name, Description, Due, Priority.
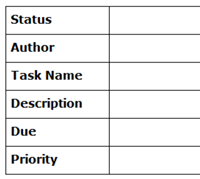
- Click into the blank cell on the first row. Use the menu option Create > Image Resource… and enter any image.
-
From the menu select Picture > Picture Properties. Click the “@” button to compute the picture. In the popup that appears enter the following formula, then click OK
@If(completed="true";"complete-doc.png";duedate<@Today;"overdue-doc.png";duedate <= @Adjust(@Today;0;0;3;0;0;0);"urgent-doc.png";"incomplete-doc.png")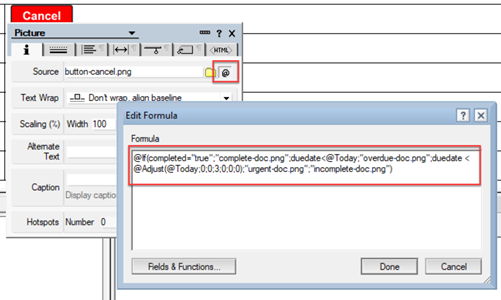
The formula determines which image to display. If the value of the
completedfield istrue, the “complete-doc.png” image is displayed. If theduedatefield is before today, the “overdue-doc.png” image is displayed. If theduedatefield is within the last 3 days, “urgent-doc.png” is displayed. Otherwise the “incomplete-doc.png” is displayed. - Select the whole of the first row and open Text Properties. On the Paragraph Hide When tab, put a tick in “Hide paragraph if formula is true” and enter the formula
@IsNewDoc.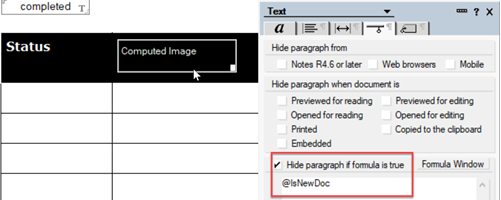
- Click into the blank cell of the second row. Use the menu option Create > Computed Text…. The font settings will go back to default, so change the font to “Verdana” and the font size to 12.
-
In the value, enter the formula
@Name([CN];@Subset(@Author;1)).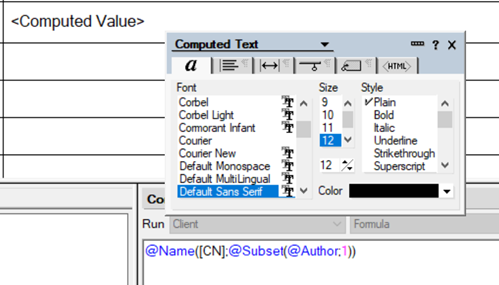
- Cut and paste the
name,description,duedate, andpriorityfields into the remaining cells. One should be on each row, on the row for the relevant label. The text properties of the cells will be changed to the settings of the original fields. So select all four cells and open up the Text Properties. Change the font to “Verdana”, the font size to 12 and the Spacing for “Above” and “Below” to “1 1/2”. -
Double-click on the
duedatefield. Change the Style to “Calendar/Time control”, with Size set to 3.5cm width and 1cm height.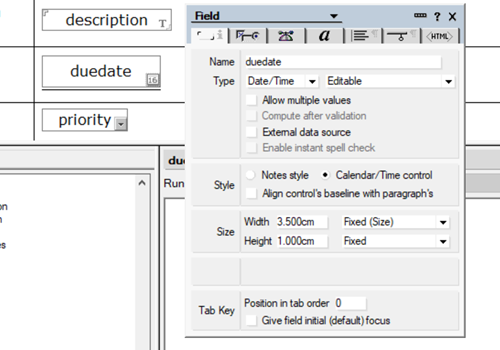
-
Double-click on the
priorityfield. Change the Type from “Text” to “Combobox”. On the second tab, change the Border Style to “None” and enter the choices (one on each line) as Low, Medium, High.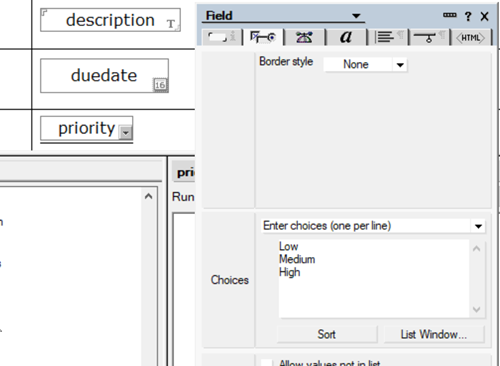
- Double-click on the “completed” field. Set the Default Value to “false” so, by default, To Dos will not be completed.
-
In the Field or Text Properties go to the penultimate tab, Paragraph Hide When. In the “Hide paragraph from” section, tick to hide it from “Notes R4.6 or later”, “Web” and “Mobile”.
The “completed” field needs to be “false” or “true”. Note, there is no boolean field type in Notes. The XPages interface was expecting text values of “true” and “false”. In Notes Client development, values of “0” and “1” are also used, as will be seen later. The “completed” field should not be available for manual editing, so it will be hidden from all client types.
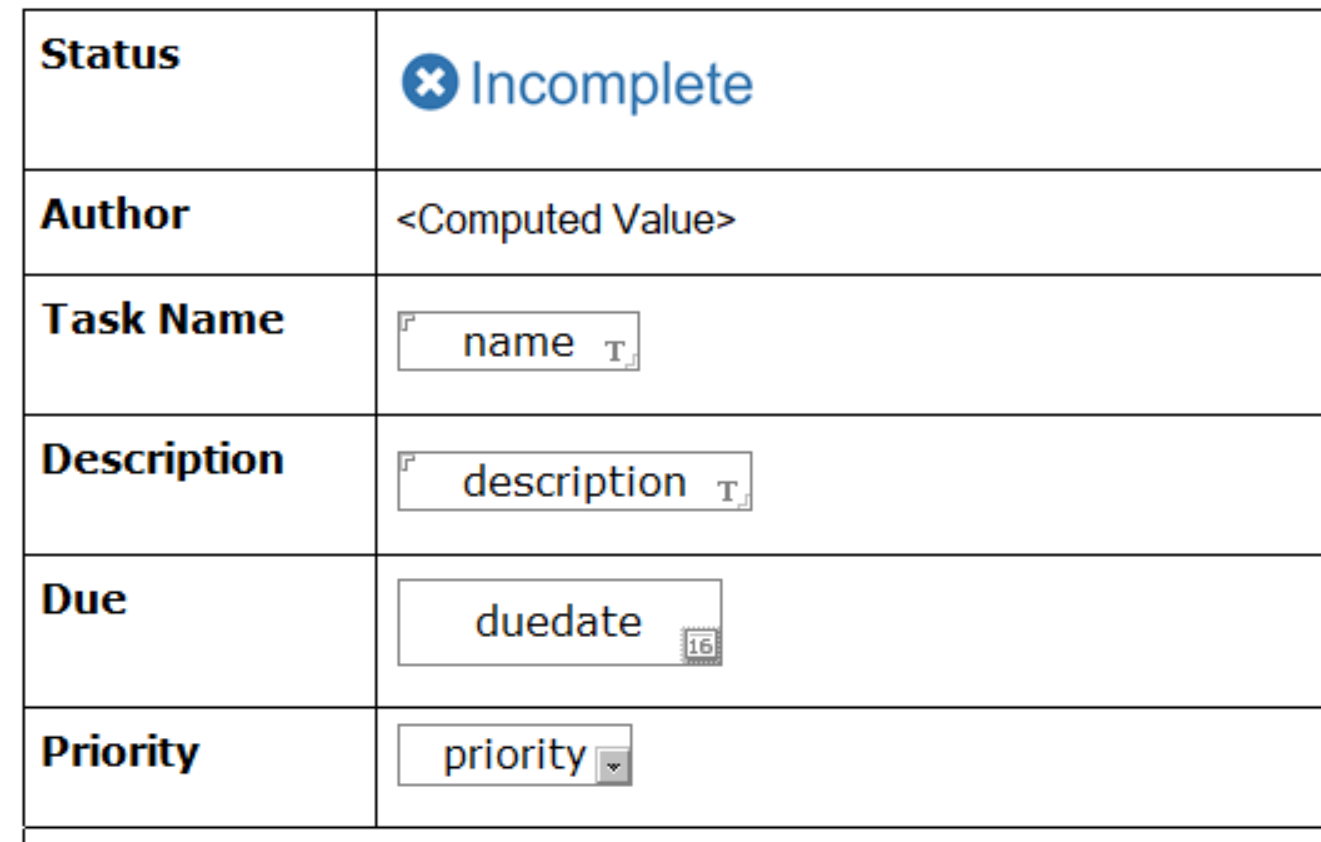
The “todo” Form should look like this:
Adding the Buttons
- Add a blank line after the table before adding the buttons. From the menu select Create > Image Resource… and insert “button-save.png”. Add two spaces and repeat, inserting “button-cancel.png”.
-
Highlight the button-save.png image. From the menu select Create > Hotspot > Action Hotspot…. By default, a green border will be added around the hotspot. Remove it by removing the tick from “Show border around hotspot”. Enter the following code as the click formula:
 @Command([FileSave]);
 @Command([EditDocument];"0");
 @Command([RefreshWindow])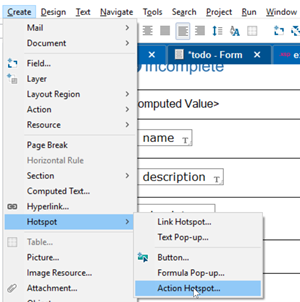
The formula saves the document, changes edit mode to “0” (false), and refreshes the window, the current tab of HCL Nomad.
- Repeat for the button-cancel.png image, this time using the code
@If(@IsNewDoc;@Command([FileCloseWindow]);@Command([EditDocument];"0")). For a new document the code needs to close it without saving, otherwise change edit mode to false. - On the next line add the “button-edit.png” and “button-delete.png” image resources.
- Add a hotspot around the button-edit.png with the code
@Command([EditDocument]). Because the default value for the second parameter is “1”, there is no need to specify the edit mode to apply. -
Add a hotspot around the button-delete.png with the code:
 @Command([Clear]);
 @Command([RefreshWindow])
@Commands are used to perform actions, with the relevant action in square brackets. Other @Functions that are intended to return a value just begin with “@” symbol, like `@IsNewDoc.
-
On the next line add the button-mark-complete.png image resource and add a hotspot around it. This time Formula Language is not enough. Change the language from “Formula” to “LotusScript” and enter the following code:
 Sub Click(Source As Button)
     Dim ws As New NotesUIWorkspace
     Dim uidoc As NotesUIDocument
     Dim doc As NotesDocument
     Set uidoc = ws.CurrentDocument
     Set doc = uidoc.Document
     doc.completed="true"
     Call doc.save(True, False)
     Call ws.ReloadWindow
 End Sub
Because the completed status will be changed from read mode, LotusScript must be used. Variables are declared using the
Dimkeyword, with the top-level object initialised at the same time asNew. The code gets the back-end version of the current document, sets itscompletedfield to “true”, and performs a save. Finally theReloadWindowcommand is run, corresponding to@Command([RefreshWindow]). -
On the next line add the button-mark-incomplete.png image resource and add a hotspot around it. Again, change the language from “Formula” to “LotusScript” and enter the following code:
Sub Click(Source As Button) Dim ws As New NotesUIWorkspace Dim uidoc As NotesUIDocument Dim doc As NotesDocument Set uidoc = ws.CurrentDocument Set doc = uidoc.Document doc.completed="false" Call doc.save(True, False) Call ws.ReloadWindow End Sub -
To set which buttons appear when, click onto the line with Save and Cancel. Open up the Text Properties and go to the penultimate tab, Paragraph Hide When. In the “Hide paragraph when document is” section, tick all entries except “Previewed for editing” and “Opened for editing”.
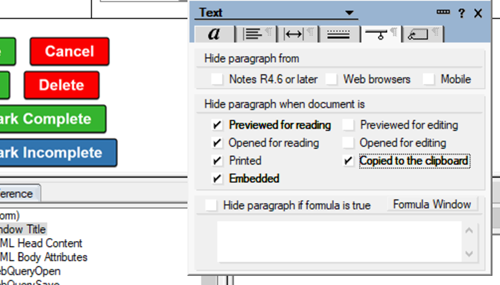
- Click onto the line with Edit and Delete. Open up the Text Properties and go to the penultimate tab, Paragraph Hide When. In the “Hide paragraph when document is” section, tick all entries except “Previewed for reading” and “Opened for reading”.
-
Click onto the line with Mark Complete. Open up the Text Properties and go to the penultimate tab, Paragraph Hide When. In the “Hide paragraph when document is” section, tick all entries except “Previewed for reading” and “Opened for reading”. In addition, add a tick in “Hide paragraph if formula is true” and enter the formula
completed="true"in the area for the hide-when formula.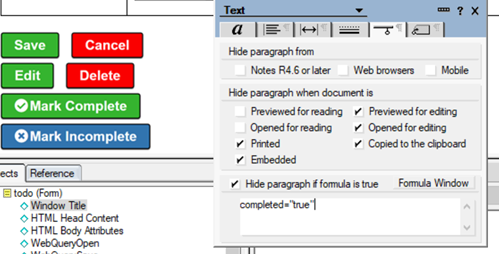
-
Click onto the line with Mark Incomplete. Open up the Text Properties and go to the penultimate tab, Paragraph Hide When. In the “Hide paragraph when document is” section, tick all entries except “Previewed for reading” and “Opened for reading”. In addition, add a tick in “Hide paragraph if formula is true” and enter the formula
completed="false"in the area for the hide-when formula.A hide-when formula applies to everything on the same line or, in a table, everything on the whole line in the cell. Saving should only be allowed if the document is being edited, so it is hidden if in read mode. Similarly editing, deleting and marking complete / incomplete should only be allowed if the document is being edited, so it is hidden if in edit mode. And marking complete should only be allowed if it’s not already complete, so it is hidden if complete is “false”. And vice versa for marking incomplete.
You can check the form in isolation by clicking the “Preview in Notes” button or the menu option “Design > Preview in Notes”.
Congratulations!
You have now set up the editable Form for To Dos.