If you will not be testing your developments on HCL Nomad, you can skip down to Setting up The Database.
Setting up HCL Nomad
It’s important to bear in mind that you cannot switch IDs on HCL Nomad. So the ID you use on HCL Nomad will need to be able to access the server you will be deploying the application we’ll develop. During the setup, you choose which ID you will use, either by retrieving it from the ID Vault or adding it manually. If unsure, follow the installation instructions for setting up HCL Nomad for iPad or Android.
Can you access any other databases on that server via HCL Nomad?
If the server you’re deploying to is part of the same trusted domain, the Notes name should work to find it. If not, the fully qualified DNS name will work. If the server is setup to allow you to connect via IP address, entering the IP address will create a connection document. Connection documents in Nomad are the same as connection documents on desktop client and stored in the same place - the local names.nsf. So another option, if all else fails, is to copy the connection document from your desktop names.nsf to a database on a server you can already access from HCL Nomad, then move it to the local names.nsf on HCL Nomad.
But typically your Domino Administrator should be able to verify how to access the relevant server from HCL Nomad.
Setting up The Database
- Download the database, as outlined in Pre-requisites.
- Copy the file to your Notes Client’s data directory. There is no specific folder location required, no dependencies on other applications, but a suggestion would be in a
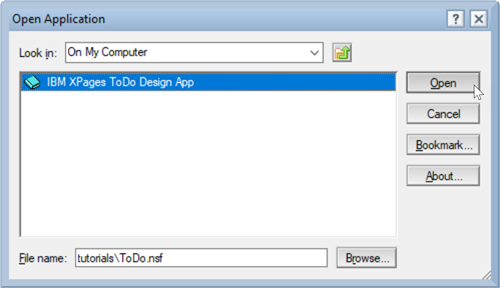
tutorialsfolder, i.e.tutorials\ToDo.nsf. If you selected the defaults for Notes install, this will be “C:\Program Files\HCL\Notes\Data”. - Open the application in HCL Notes using File > Open > HCL Notes Application (keyboard shortcut is Ctrl + O). navigating to the location you placed the file.


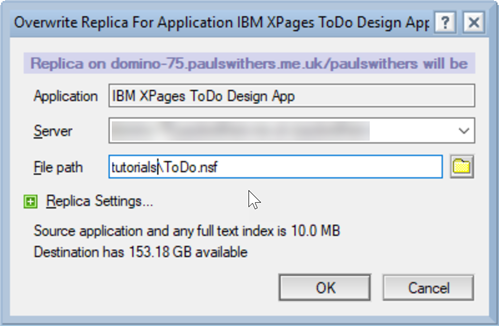
- Choose File > Replication > New Replica… and create a replica on the server you will be accessing from HCL Nomad. NOTE: If you won’t be using HCL Nomad to test, you can just work on the local database, you do not need to copy it to the server.

If you have file level access to the server, you can put the database directly on the server instead of putting in your Notes Client’s data directory and replicating up to the server.
Securing The Database
One of the powers of HCL Domino is security. But obviously the initial design needs to be shared in an open access format for you to use. So the first action to take is to secure the database by updating the application’s Access Control List.
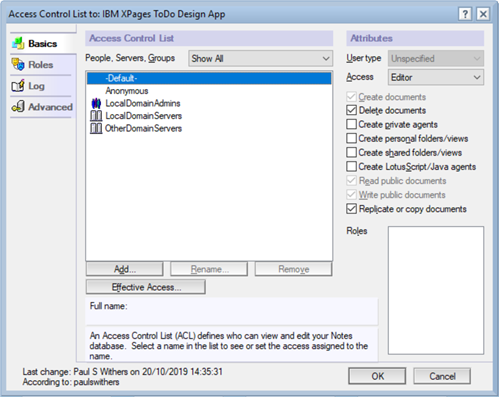
- Go to File > Application > Access Control… to bring up the Access Control List dialog.

- Best practice is to use groups for servers and administrators. In a production environment, developers may be in a different group to administrators. The following table assumes you are already in the “LocalDomainAdmins” group for the relevant server. If not, ensure you add an entry with Manager access for yourself. “Anonymous” and “Default” a special keywords. Anonymous should always be added and set to “No Access” unless open web access is required. Default applies to all authenticated users and should be set accordingly. In this case, there is no intention to restrict access to the application to only a subset of users, so Default is left open.
| Name | User type | Access | Attribute Changes |
|---|---|---|---|
| Default | Unspecified | Editor | Delete documents |
| Anonymous | Unspecified | No Access | |
| LocalDomainAdmins | Person group | Manager | |
| LocalDomainServers | Server group | Manager | |
| OtherDomainServers | Server group | No Access |
Can you access any this application?
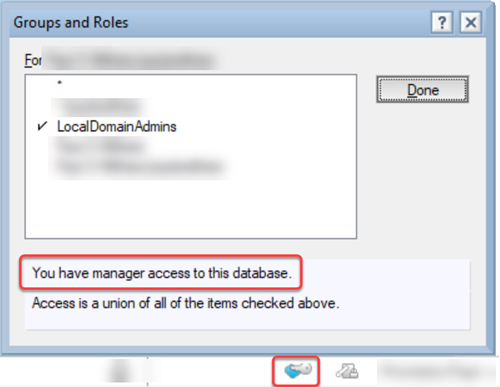
After changing the ACL, double-check you can still access it via the Notes Client. It’s worth opening and closing the application after an ACL change, to ensure access is updated. From the Workspace, signle-click on the To Do application and click on the icon with the hover text “Security” in the Status Bar at the bottom of HCL Notes. Hopefully this icon looks like a key on a book. Clicking on the icon will display a dialog, showing your level of access and how that level of access has been resolved.

Can you access this application on HCL Nomad?
It’s worth trying to access the application on HCL Nomad. Open HCL Nomad, click on the “hamburger” icon top left and select “Open Application”. The dialog is the same as on the Notes Client. Navigate to the server and the To Do application and double-click on it. If everything is set up correctly, the application will open. You could create an offline version now, but you would need to replicate when testing. So we’ll cover that later.
You’re now ready to start developing for HCL Nomad!
Previous Page Next Page